Well… that’s a mouth full, but I couldn’t describe it better any other way 🙂 Because that’s what I’m doing right now!
In this ‘tutorial’, I will explain the steps I did to achieve a basic MDT LTI deployment based on:
- MDT Lite Touch Deployment
- FAT32 Formatted USB Bootable WinPE 5.0 stick
- Deploy HP ElitePad 900 with all drivers installed working out-of-the-box
For a new project I’m working for a major health care facility which are going to use approx. 800 HP Elitepad 900 tablets, who will be running not the stock Windows 8, but the recently released Windows 8.1.
Currently I’m in testing phase so I’ve got a nice setup at home, running some VM’s, a connection to my deployment share and of course a HP Elitepad 900 tablet, with HP Expansion Jacket and HP Dockingstation
To get things going I first installed a MDT 2013 dedicated machine, with the newly released Windows ADK 8.1 which brings us support for Windows 8.1 and Server 2012R2.
Then I recovered the HP Elitepad 900 which was already used for some testing, back to factory settings and started the whole operation.
For the following weeks, I will try to keep track of the most important things I encounter and share my experiences with you all.
The first thing I had to do is create a driver folder structure in MDT which makes sense (at least for me it does).
figure 1.1: Deployment Share Driver folder structure
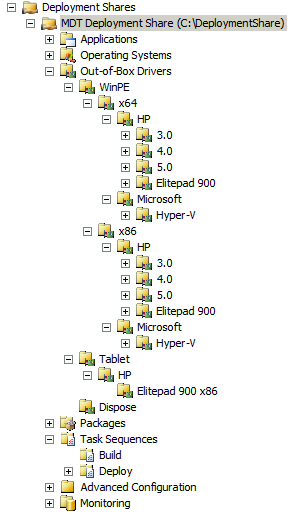
As you can see I created several additional driver folders parenting in the WinPE folder, this is all for driver manageability.
HP offers perfect support when it comes to driver packs for the various WinPE environments, so I have downloaded all available packs and imported them into MDT.
The drivers of the HP ElitePad 900 came from the following sources:
HP Website
Microsoft Windows Update Catalog
Extraction of the following HP executable, which can be downloaded from the HP website listed above: “.\sp64292\x86_Win8.1\Driver – Firmware and Chipset\HP\sp63851”
Keep in mind you need to extract the SP64292 file AND the SP63851, when all drivers are extracted, together with all other HP ElitePad 900 drivers, target the “Import Drivers” step to the parenting folder which possesses all drivers.
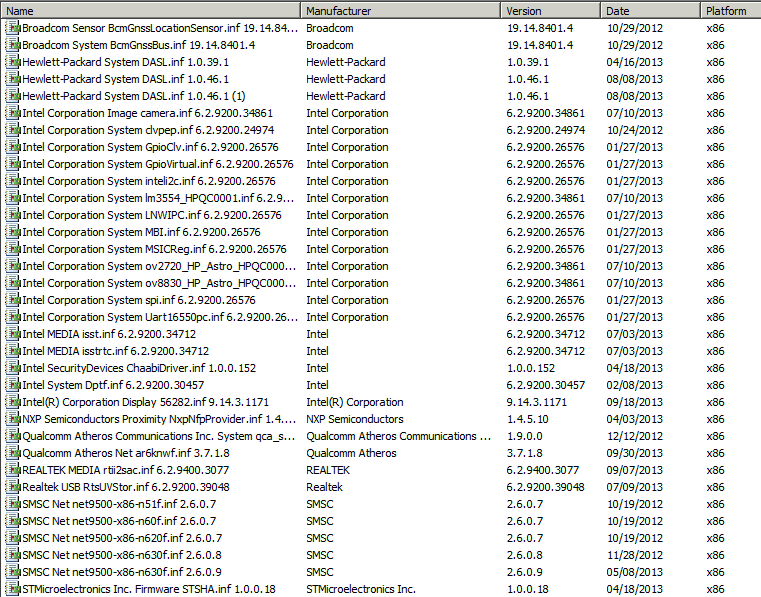
When all drivers are imported, it should look something like this
figure 1.2: HP ElitePad 900 drivers
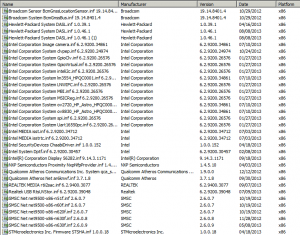
Because the HP ElitePad 900 also has touchpad (which actually works in WinPE IF you embed this into the boot image) drivers and other specific drivers, I targeted these drivers specifically in a separate folder.
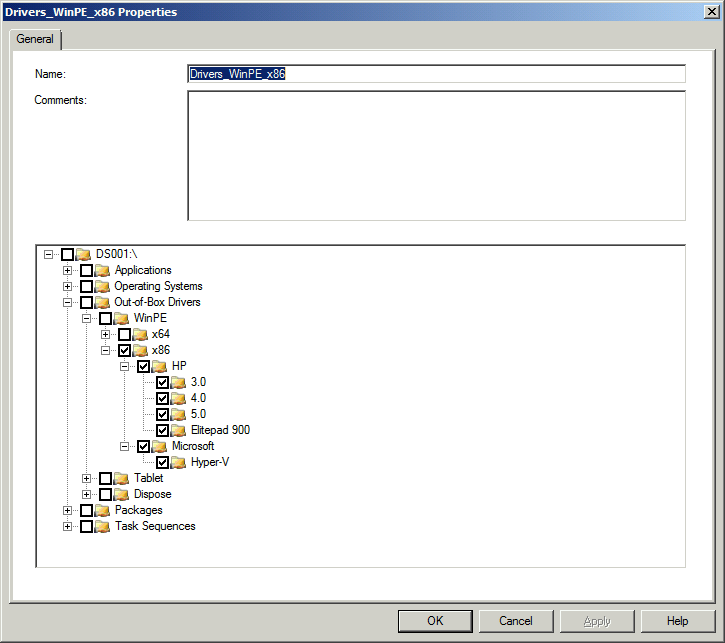
With these folders, I have created selection profiles. These selection profiles target individual (driver) folders and present only the content that is residing in that folder during a certain step in the task sequence. This way I have managed to create a WinPE x64 and x86 folder, and I can target these folders individually when generating the boot images for x64 and x86 deployments.
Figure 1.3: Selection Profile Properties
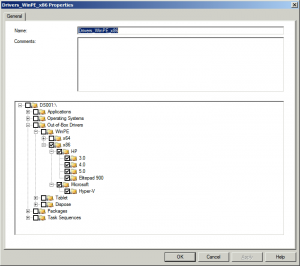
Makes sense right? Each selection profile targets a different WinPE platform folder
figure 1.4: Overview of Selection Profiles

How this looks on the deployment share properties?
figure 1.5: WinPE x64 Properties
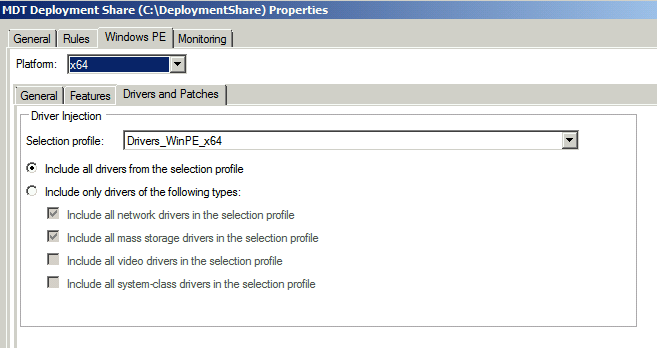
figure 1.6: WinPE x86 Properties

Next we can have a look at targeting the drivers for the HP ElitePad 900 in a decent manner. (Johan Arwidmark has described a new driver management approach for MDT 2013 Lite Touch, read it here).
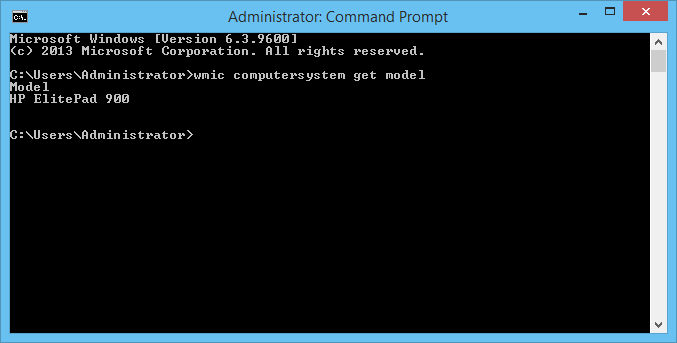
First I have executed the following ‘query’, on the HP ElitePad 900 in a command prompt:
“wmic computersystem get model“, which showed the following result
figure 1.7: Result of query
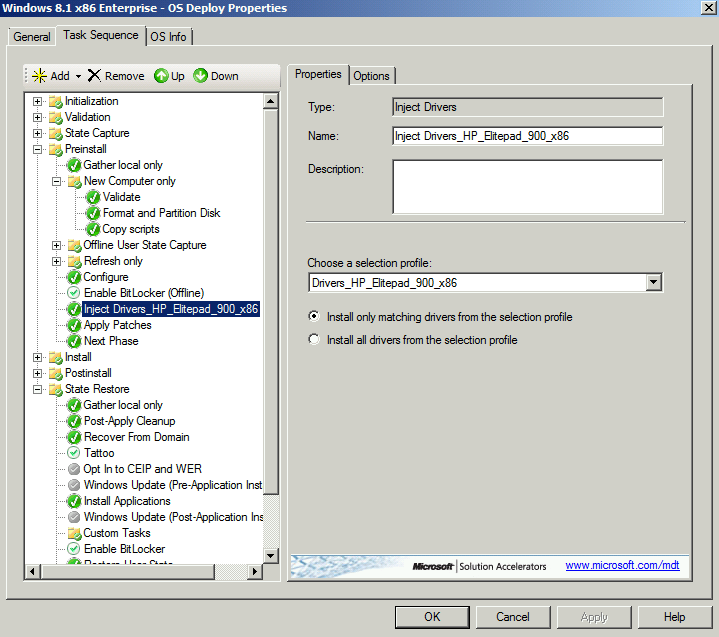
Since we have imported the drivers of the HP ElitePad 900 in a earlier stage, the remainder of what we need to do is modify the “Inject Drivers” step in the task sequence to target only the drivers for the HP ElitePad 900. So open up the deployment task sequence, and advance to the step “Preinstall\Inject Drivers”, and select the driver Profile matching the HP ElitePad 900
figure 1.8: Inject Drivers based on Selection Profile

Now to make sure that these drivers are only applied if the model equals the HP ElitePad 900 our little query comes in handy
figure 1.9: WMI Condition on Inject Drivers step
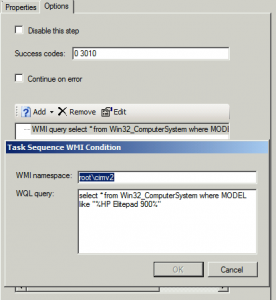
The exact WMI query used is: ” Select * FROM Win32_ComputerSystem WHERE Model like “%HP Elitepad 900%” ” (without the two “” at both ends, that’s just me explaining the query 😉 )
The next thing we need to configure is disk partitioning of the HP ElitePad 900, since it’s a UEFI based machine, it uses GPT, so advance to the step: “Preinstall\New Computer Only\Format and Partition Disk” and change the disk type from: Standard (MBR) to GPT
figure 1.10: Format and Partition Disk GPT
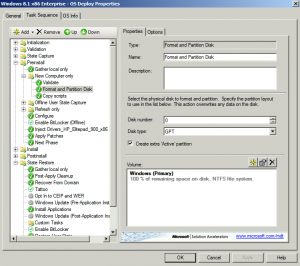
Click Apply and OK.
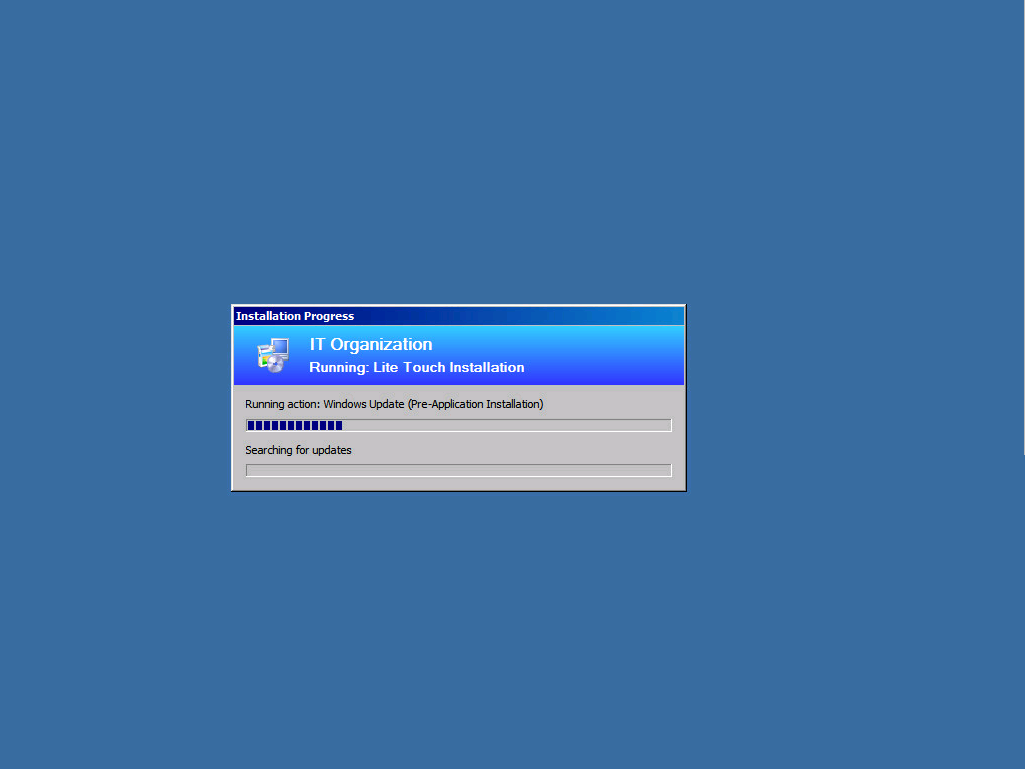
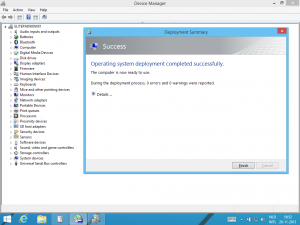
Basically we are ready to perform a deployment test, and that’s what I have done during the writing of this blog, to see the following results:
Figure 1.11: Device Manager OK! (no unknown devices left) and Deployment Finished successfully!
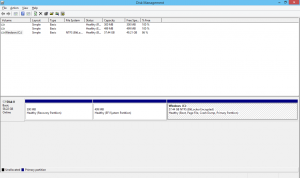
Also what we can see is that by selecting the GPT Disk type, during deployment the GPT partitions have been created automatically.
figure 1.12: Disk Management GPT Scheme
This concludes my little tutorial of how to deploy Windows 8.1 to the HP ElitePad 900.
In the upcoming period I’m going to:
- Configure the Default User Profile
- Configure the start screen with the Start-Layout PowerShell command
- Configure Bitlocker
- Configure Direct Access
- Configure and tweak Windows 8.1 wherever it is needed
- Configure the LTI deployment furthermore so that it becomes fully automated just like ZTI 🙂
- Configure RES Automation Manager and RES Workspace Manager for automation and user workspace management
And of course the test environment will be mitigated to a Windows Server 2012R2 with WDS and PXE Boot enabled to deploy these tablets via PXE, and we will see how that goes!
I’ll leave you all with a little package that might become handy when you are going to approach the same challenge. In the attached zip file you will find:
- BDD.log_properties which are quite useful to determine al kinds of conditions, queries and variables
- A Driver list which is an export of my HP ElitePad 900 driver folder, so you can verify if all drivers are present
- All screenshots used in this tutorial

HP_ElitePad_900.zip
Keep on automating my young padawans 😀
! Any general reconsideration’s to keep in mind are:
- Format the bootable USB drive with FAT32, NTFS is not read by the HP ElitePad 900
- When staging a HP ElitePad 900, make sure a USB keyboard is attached if you are performing an LTI deployment, yes touch works, but that doens’t mean you can type in WinPE!!!